 Anacortes
 Why Cap Sante Homes Wear Out Their Siding Faster
Cap Sante sits up on the bluff above the Anacortes marina, and that elevation is a mixed blessing. The views are hard to beat, but the same exposure that gives you a clear line to the water also puts your siding in the direct path of salt-laden air, wind-driven rain coming off Fidalgo Bay and Rosario Strait, and the low winter sun angle that keeps north and east-facing walls damp for days after a storm. Add in Skagit County's long moss season — six or more months a year where shaded and low-airflow wall sections rarely fully dry out — and you have a set of conditions that will find every weak point in a siding system within a few winters.
We install siding across Anacortes, but Cap Sante specifically gets more wind loading and more airborne salt than sites further inland, like parts of the flatter areas near town. That matters for fastening schedules, flashing details, and which siding product actually belongs on the wall. This page focuses on siding installation for this specific pocket of the city — what the climate does to a wall assembly here, what a correct install looks like, and why the details matter more on an exposed hillside lot than they would somewhere sheltered.
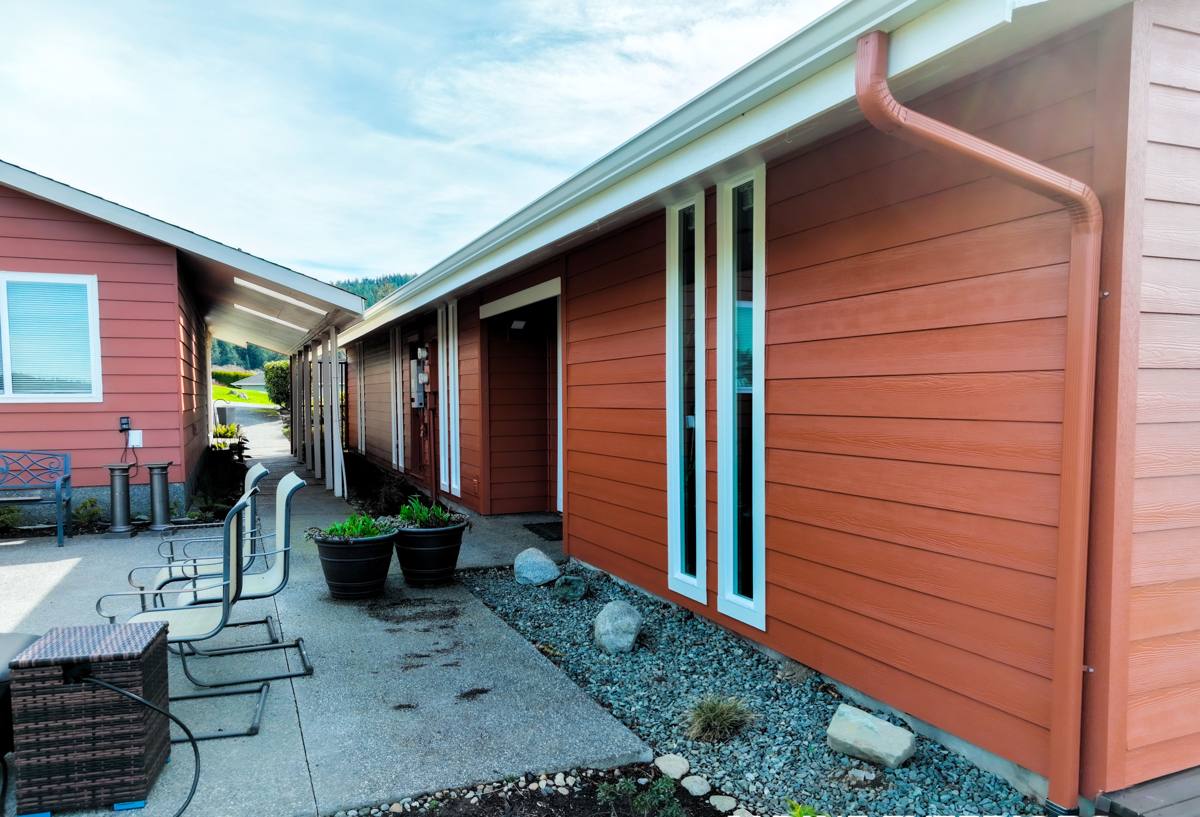
What Salt Air and Driving Rain Actually Do to Siding
It helps to understand the failure mechanisms before talking about the fix.
Salt air
Airborne salt is corrosive to exposed metal fasteners, trim flashing, and hardware. On a bluff-top or waterfront-facing home, that corrosion process runs faster than it would a few miles inland. Siding materials themselves don't rust, but the fasteners, flashing, and trim accessories holding a system together can degrade years ahead of schedule if the wrong metals or coatings were used.
Wind-driven rain
On an exposed site, rain doesn't just fall — it's pushed sideways and upward under laps, around trim, and into any gap in the water-resistive barrier. A siding installation that would hold up fine on a calm, tree-sheltered lot can leak within a season or two on a windier Cap Sante elevation if flap-and-lap details, flashing, and caulking aren't built for that higher wind-driven-rain load.
Moss and prolonged moisture
Skagit County's long, wet, mild winters keep moisture in contact with exterior walls for extended stretches. On shaded sides of the house, or wherever ventilation is poor, moss and algae take hold on siding surfaces and in ground-level trim. Beyond looking bad, sustained moisture contact is what breaks down siding materials that aren't dimensionally stable or that absorb water at the edges.
Why We Install James Hardie Fiber Cement Here — and Nothing Else
We install exclusively James Hardie fiber cement siding. We don't install vinyl, LP SmartSide, cedar, primed spruce, Cemplank, or Allura, and on a site like Cap Sante the reasoning is straightforward:
- Non-combustible material — fiber cement doesn't contribute fuel to a fire, which matters anywhere wildfire smoke and ember exposure is a seasonal concern in Western Washington.
- Dimensionally stable in wet-dry cycling — unlike wood-based products, Hardie's fiber cement doesn't swell, cup, or rot at cut edges when it stays damp for long stretches, which is exactly the condition Cap Sante's moss season creates.
- Climate-engineered HZ product lines — Hardie manufactures HZ5 boards specifically for wetter, harsher climate zones, with engineering aimed at moisture and impact performance rather than a one-size-fits-all board.
- Factory-applied ColorPlus finish — a baked-on finish resists the fading and touch-up patchwork that field-painted siding needs, which matters on a house that gets direct reflected sun off the water for part of the day.
- Transferable warranty backing — a real manufacturer warranty structure that follows the product, not just the labor.
Vinyl is lightweight and inexpensive but expands, contracts, and can distort in sustained wind loading and temperature swings; wood-based and untreated wood products need vigilant maintenance to resist the rot cycle this climate sets up. None of that means those products are worthless everywhere — it means we've made a professional call not to put them on homes in a climate like this one, and Cap Sante's exposure is a clear example of why.
What a Correct Installation Actually Involves
Fiber cement siding is only as good as the wall assembly underneath it. On an exposed site, the installation details below aren't optional extras — they're what determines whether the siding lasts 30+ years or starts showing problems in five.
Water-resistive barrier and flashing first
Before a single board goes up, the wall needs a continuous water-resistive barrier, properly lapped and taped, with flashing integrated at every window, door, deck ledger, and penetration. This is the layer that actually stops bulk water — the siding is the second line of defense, not the first.
Rainscreen gap where exposure calls for it
On higher-wind-load, higher-moisture sites, a drainage gap behind the siding lets any water that does get past the cladding drain and the wall assembly dry out, instead of sitting against the WRB. We evaluate this wall-by-wall based on orientation and exposure rather than applying one standard to every elevation.
Fastening and clearances to spec
Hardie's installation instructions specify fastener type, spacing, and penetration depth, plus minimum clearances from grade, roof lines, and decks. On a windier lot those fastening schedules matter even more — under-fastened siding is one of the more common causes of premature failure we see on exposed coastal sites generally.
Caulking and joint treatment done right — or skipped where it shouldn't be
Some joints need sealant; some are designed to be left open for drainage. Sealing the wrong joint traps water behind the board; failing to seal one that needs it lets wind-driven rain straight through. This is a detail-level judgment call that depends on the specific product line and joint type.
Corrosion-resistant hardware
Given the salt air exposure up on the bluff, we use fasteners and flashing metals rated for coastal and marine-influenced environments rather than standard-grade hardware that will corrode ahead of schedule.
Our Installation Process
- On-site assessment — we look at each elevation's exposure, existing wall condition, moisture damage, and ventilation before quoting anything.
- Tear-off and substrate check — removing old siding is when hidden rot, sheathing damage, or past water intrusion actually surfaces. We address what we find rather than siding over it.
- WRB, flashing, and drainage plane installation — the part of the job that doesn't show once it's done, but determines everything after.
- Hardie board installation to manufacturer spec — correct fastening, clearances, and joint treatment by elevation.
- Trim, caulking, and finish detailing — the visible work, done last and to the same standard as the parts you won't see again.
- Final walkthrough — reviewing the completed work with the homeowner before we consider the job done.
Cost Factors on a Cap Sante Project
Every home is different, but the variables that move a siding installation estimate up or down on a site like this tend to be consistent:
| Factor | Why It Matters |
|---|---|
| Tear-off and substrate condition | Hidden rot or moisture damage found during removal adds repair scope before new siding can go on |
| Wall height and access | Multi-story and steep-lot homes common on the bluff need more scaffolding and staging time |
| Number of elevations and complexity | Dormers, bump-outs, and multiple roof lines multiply flashing and trim work |
| Rainscreen / drainage gap scope | Higher-exposure elevations may warrant a drainage gap, which adds material and labor |
| Hardie product line and profile | Lap siding, panel systems, and trim packages price differently by board and finish |
| Window, door, and penetration count | Each one needs individual flashing integration |
We walk every project in person and price it based on what we actually find on your walls — not a flat per-square-foot number that ignores the condition underneath.
Why Local Installation Experience Matters Here
Anacortes and Skagit County exterior work has its own rhythm — permitting timelines, typical framing and sheathing practices in homes of different eras, and a climate that behaves differently than siding literature written for a national audience assumes. A crew that already works this hillside knows which elevations tend to hold moisture longest, where wind loading pushes rain that a standard install detail wouldn't anticipate, and how the moss season here actually plays out over a full year rather than a single site visit.
That local pattern-recognition is hard to get from a crew that mostly works inland or in a different climate zone. It shows up in small decisions — where to add a drainage gap, which joints to seal versus leave open, what fastener grade to spec — that don't show up on an estimate sheet but show up in how the siding performs ten winters from now.
A Homeowner's Checklist Before Hiring
- Ask what water-resistive barrier and flashing details are included — not just the visible siding product
- Confirm whether a rainscreen/drainage gap is being used on exposed elevations, and why or why not
- Ask what fastener and flashing hardware grade is being used given salt air exposure
- Get manufacturer installation instructions referenced specifically, not just "industry standard"
- Ask how tear-off findings (rot, hidden damage) are handled and priced if discovered mid-project
- Confirm what warranty applies to both the product and the labor, and how it's documented
If you're weighing a siding replacement on a Cap Sante property and want a straight answer on what your specific walls need, we're glad to come take a look. The estimate is free, there's no pressure, and you'll get a clear read on condition and options — just fill out the form below to get started.